Teleoperation
Clearbot
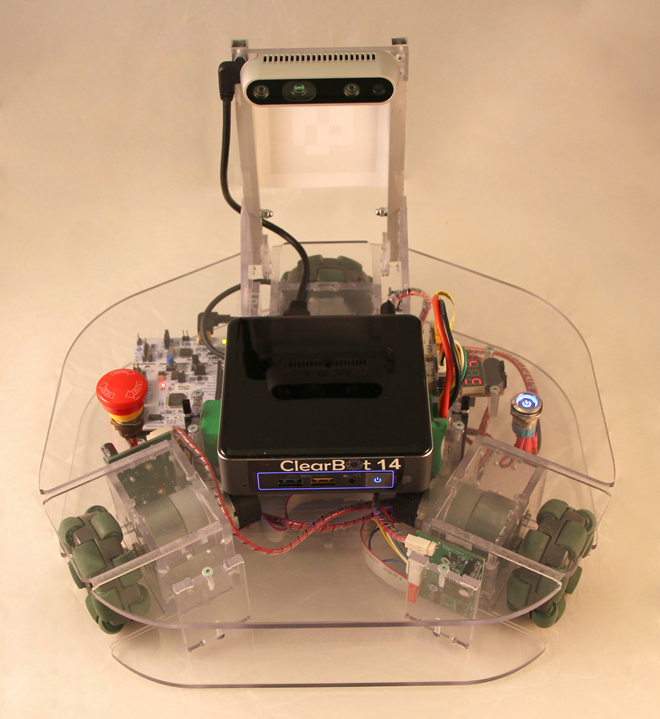
Clearbot is an omnidirectionally moving platform meant for educational purposes. The platform is grown out from the Tartu University’s football robot at ROBOTEX robot competition, which was customized for teaching. Clearbot combines an Intel Realsense 3D depth camera and Intel NUC on-board computer to perform computationally expensive tasks (e.g. 3D mapping) locally on the robot. More information on Clearbot is available here.
Start Clearbot drivers
In order to start ROS programs on Clearbot, we need to log into the robot.
Open a new terminal and establish an ssh connection:
ssh kasutaja@clearbot-X
where X has to be replaced with the ID written on the robot. For example:
clearbot-3.Enter the password given to you by the instructor.
Tip
For security reasons, passwords are not shown as asterisks or bullets when being typed into the terminal. So no panic, your keyboard works just fine. Simply type the password and hit enter.
When logged in successfully, you can see that the terminal prompt has changed from
academy@laptop-Xtokasutaja@clearbot-X. This will be an important reference when trying to figure out which terminal is connected to where.After logging into the robot, the ROS environment should be automatically sourced for you. You can quickly display the last lines of the file with
tail ~/.bashrccommand to examine which workspaces are sourced.Recall the
printenvandechocommands to check that the required ROS variables are set.If all looks good, use to start the driver:
roslaunch robotont_teleop teleop_bare.launch
Teleoperation using a remote ROS Master
- The robot driver subscribes to a specific type of messages called velocity commands. The standard name for this topic is
/cmd_velor/robotont/cmd_velwhen in robot namespace. - The message is of type
geometry_msgs/Twistand it’s structure can be found from ROS wiki <https://docs.ros.org/api/geometry_msgs/html/msg/Twist.html>.
To set and control the robot speed, we need to continuously publish the velocity commands. Tomorrow we look how to write the publishers from scratch, but for now let’s use a package that listens keyboard events and publishes them as Twist messages.
Open a new terminal
Configure the ROS environment to connect to the master on the robot:
set_master
The small script asks for the robot’s ID and sets ROS environmental variables accordingly.
Now you are ready to run the ros node which listens keyboard events and publishes them as velocity commands:
roslaunch robotont_teleop teleop_pc_side.launch
Warning
From this point beyond, you are able to drive the robot with a keyboard. Should you loose control over the robot, do one of the following
- PRESS “k” TO STOP THE ROBOT!
- PRESS THE EMERGENCY SWITCH ON THE ROBOT.
- LIFT THE ROBOT FROM THE GROUND AND CALL AN INSTRUCTOR.
Look at the instructions printed to the terminal. Your tasks are:
- Move around to understand the dynamics of the robot;
- Use Shift or Caps Lock to use holonomic mode;
- Change the driving speed by increasing / decreasing linear and agular velocities.
Hint
Notice that the teleop node only receives keypresses only when the terminal window is active.
Tip
Use
CTRL + Cto stop the node.