Navigation
Now that you have successfully tuned your SLAM package, it is time to move on to autonomous navigation.
Configuring SLAM and navigation launch file
First of all, we have to configure our launch file like when we worked with 2D mapping.
- Open teleop_carto_with_navstack.launch from your package.
- Change the launch file so that it reads configuration files from your package. (NOTE: You have to change paths in 8 places.)
Launching SLAM and navstack and mapping the room
Now that you have configured the launch files, let’s try running the navstack on Clearbot.
In robot’s terminal, run roscore.
In another robot terminal, launch
roslaunch <your_package_name> teleop_carto_with_navstack.launch.launch
This will run the mapping software.
In the PC, launch:
roslaunch robotont_description display_2dmapping.launch
This will launch preconfigured RViz environment.
In the PC, launch:
roslaunch robotont_teleop teleop_pc_side.launch
From this terminal, you can control the robot.
All very similar to last task, now you should be able to map.
If you are satisfied with your map, move on to navigation.
If you want to save your map, you can use:
rosrun map_server map_saver
And load it later with:
rosrun map_server map_server map.yaml
Using ROS navstack
Using the navstack in ROS is very straightforward, you tell the robot where it is (if it doesnt already know) and where it needs to go.
In case you have not created a map right now and instead loaded it in externally, you have to tell the robot where it currently is.
If you have just created a map and have not loaded it in separately and the robot seems to be in RViz, where it is actually, then you may SKIP THIS STEP.
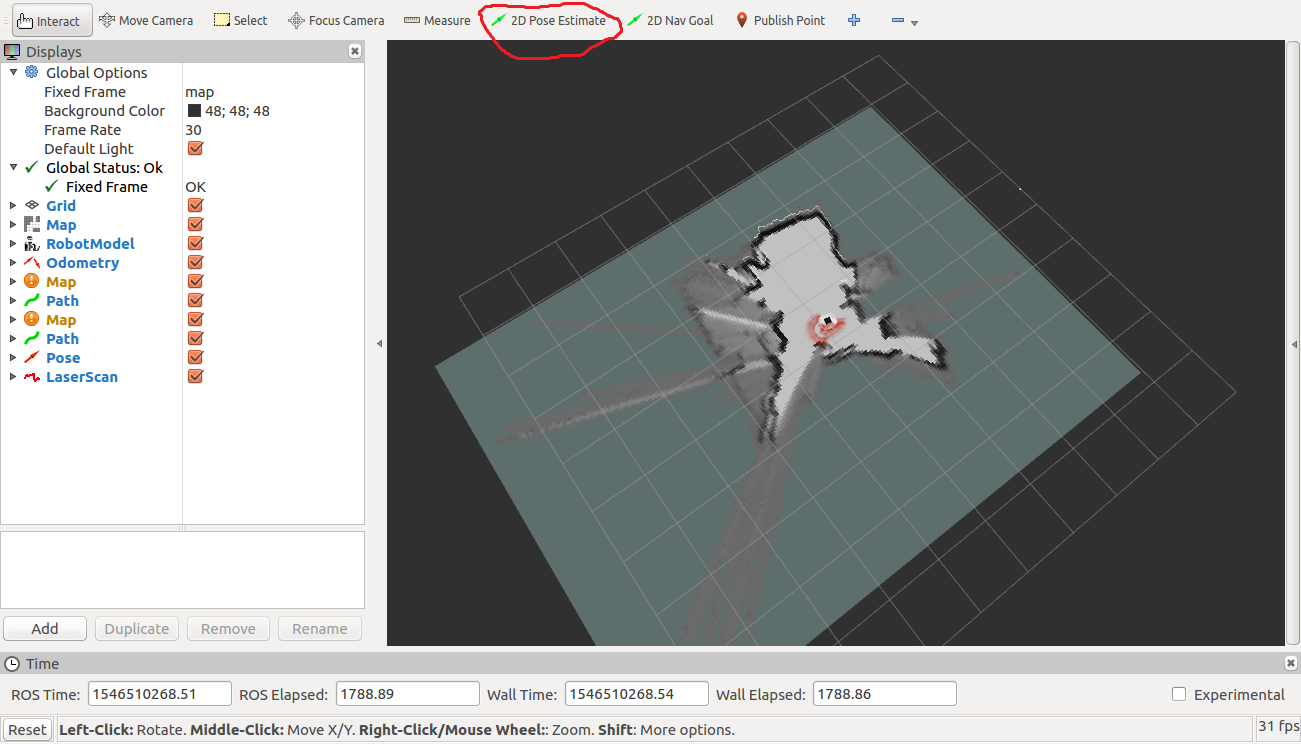
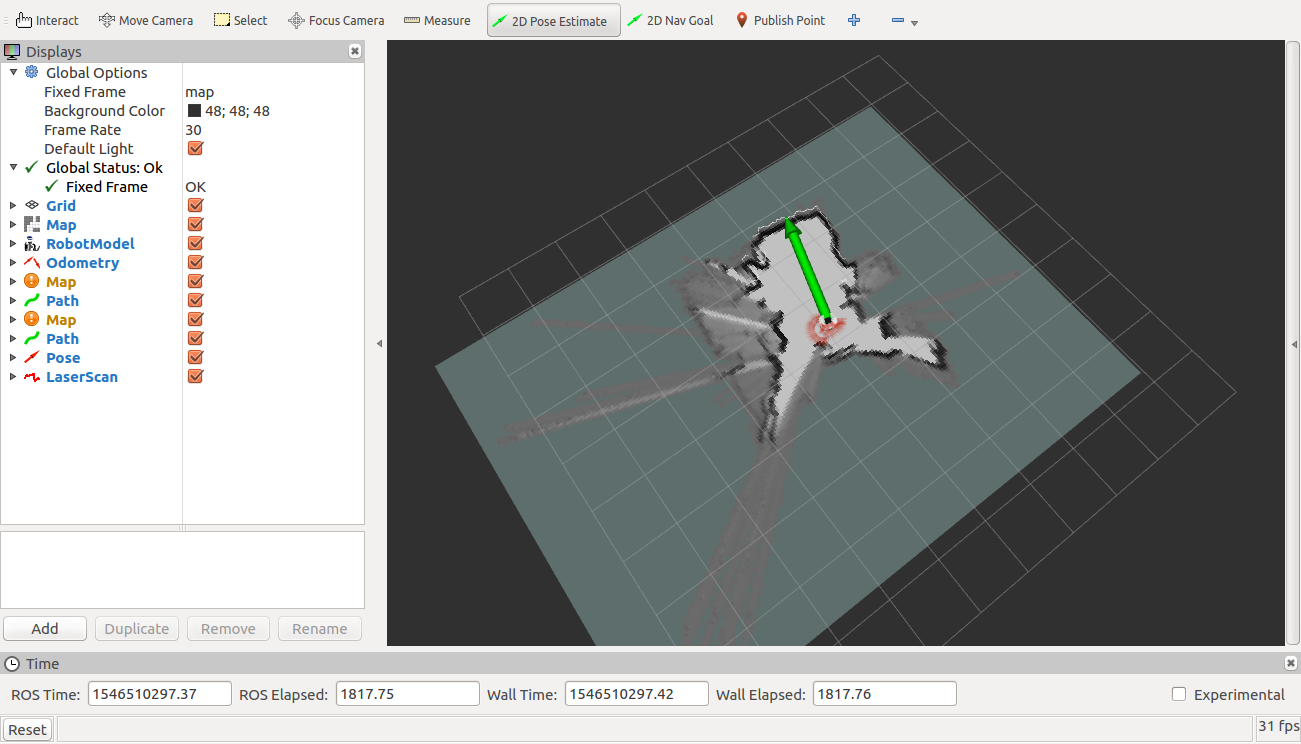
For setting initial pose, click on 2D Pose Estimate and drag the arrow where and how the robot actually is.
To tell the robot where to go, click on 2D Nav Goal and drag the arrow to where you want the robot to go and which way does it have to face.
Configuring navstack
Now that you have the experience of how navigation works in ROS, let’s try tuning some parameters to improve (or not) the navigation software.
In your package’s configuration folder, the relevant files are those that begin with “costmap” and planner.yaml.
From these files, you can configure how your robot uses the navigation stack. The most important file here for you is planner.yaml. From this file, you can tune the parameters for the planner. Reference can be found here: http://wiki.ros.org/base_local_planner .
First, open navstack.launch and change the paths to point to your configuration files just like before.
Now open planner.yaml. Your task is to configure the planner and make it work better.
What if you would change acceleration limits? What if you would try to increase or decrease the goal tolerance? What if you changed local and global map sizes in the launch file? You can use ROS Wiki to see what the parameters do and make the robot navigate more accurately.
To test your new configuration, launch navstack.launch. If you have launched teleop_carto_with_navstack.launch then this launch will kill the navstack process in that terminal and launch a new one.
After the first launch, for next testing, just use Ctrl+C to kill the process and then launch it again.
If you are satisfied with the performance of your navigation, congratulations!


