Using MoveIt GUI
ROS MoveIt is a powerful collection of capabilities that make it very easy to start working with robot manipulators. First we are going to look at some core capabilties that MoveIt provides by using its GUI within RViz.
In order to start working with MoveIt, we’ll download ROS and MoveIt support packages for an existing robot manipulator. Today we’ll work with UFACTORY xArm7.
Clone the xArm ROS support into the src/ folder of your catkin workspace.
$ git clone https://github.com/ut-ims-robotics/xarm_ros.git
Next build the workspace:
$ catkin build
The xArm7 already has everything set up for MoveIt, so we can simply launch their demo.
$ roslaunch xarm7_moveit_config demo.launch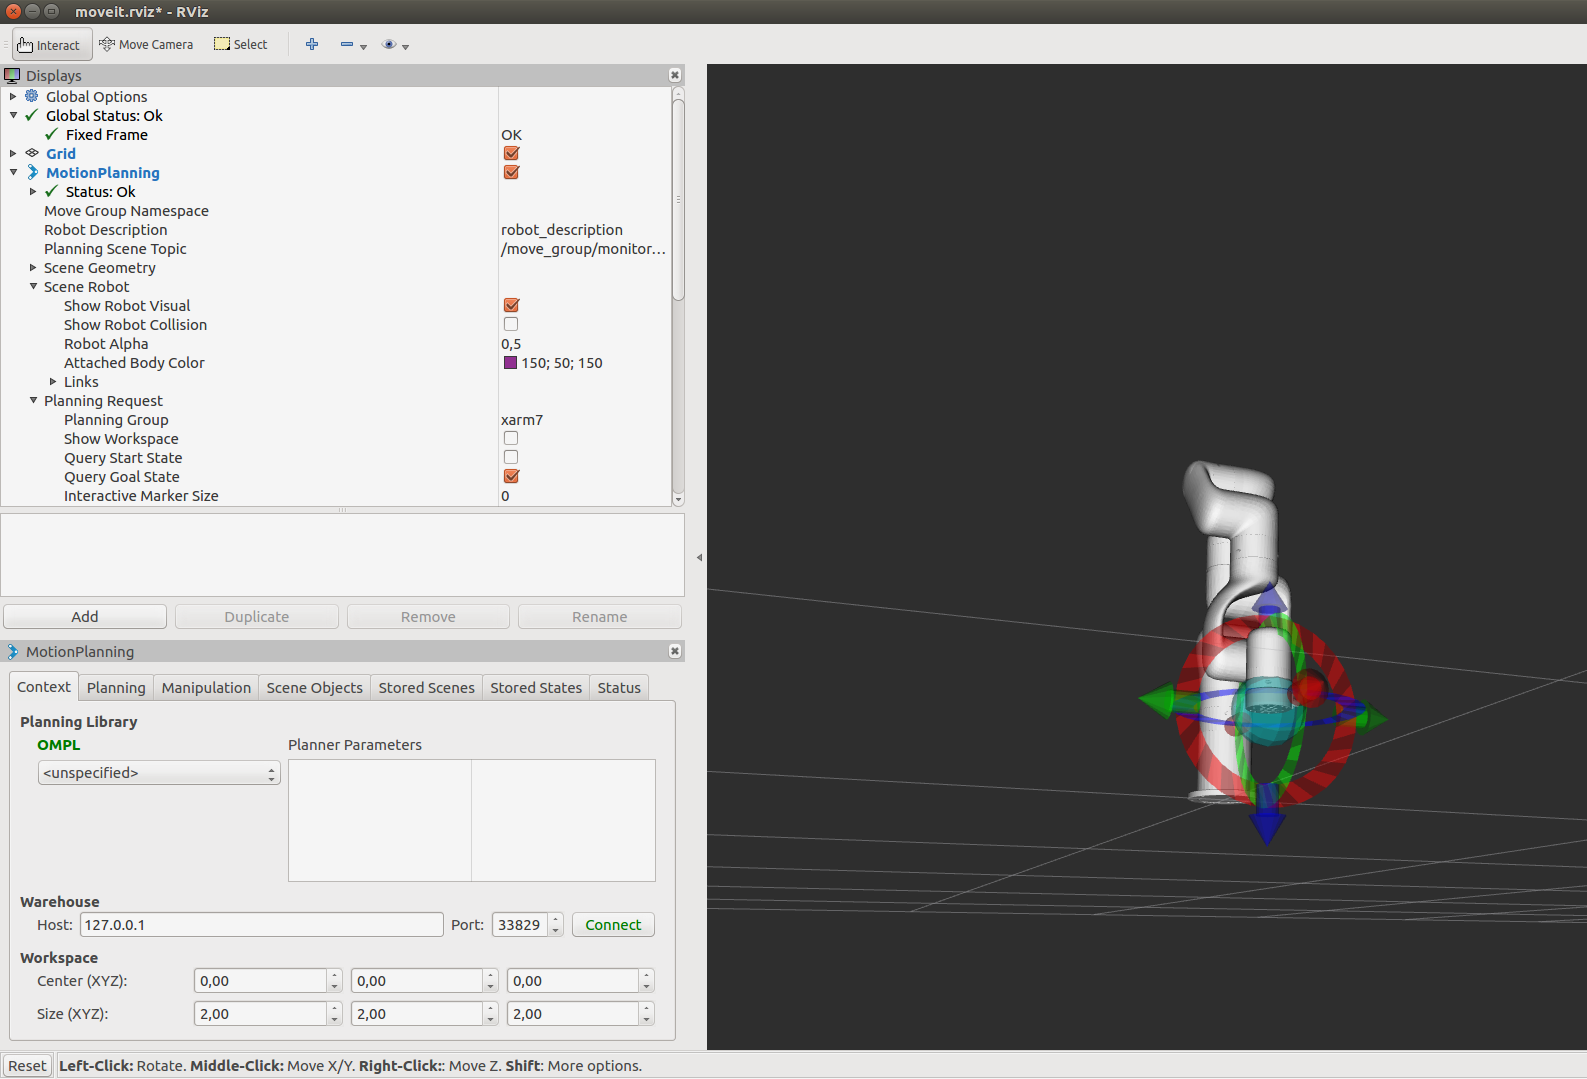
If everything worked out, you should now have an RViz window with xArm7 robot model as depicted above.
On the bottom left of the RViz window, you will see MoveIt controls and on the right-hand side there is the robot model with interactive marker in red, green, and blue. In the MoveIt controls (the MotionPlanning panel), switch to Planning tab. Feel free to drag the interactive markers to choose a target pose (visualized in orange) for the manipulator. Then click on the Plan button. After you have visually verified the plan, click on Execute. And that is it. That is how easy it is to make a manipulator plan and execute a collision-free path using MoveIt GUI.

Try restoring the inital pose of the robot by choosing home_pose from the drop-down menu under Select Goal State.